In a previous post I described how you can use variables in ‘_includes’. I took advantage of those variables to create a ‘widget’ that allowed something similar to extending liquid with a plugin created tag.
In this post I take the same approach to create a widget that creates a data-toggle element to hide blocks of code or text you might only want available to readers on demand. (demo follows later)
We’re already using Bootstrap through-out the template we may as well use their tool here as well. Behind the scenes Bootstrap uses JQuery so this isn’t a pure HTML solution but it is an easily reusable element you can access directly while creating markdown content.
I’ve gave the ‘widget’ a name of toggle-field.html and placed it within a ‘widgets’ folder inside the _includes folder.
Directions: This is how you use the ‘widget’:
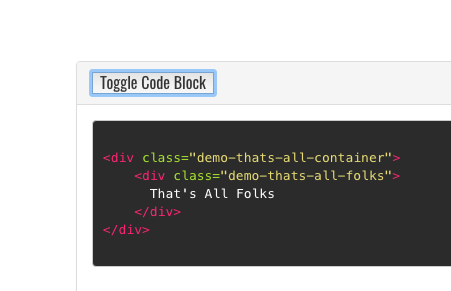
 {% capture text-capture %}

```html

<div class="demo-thats-all-container">
    <div class="demo-thats-all-folks">
      That's All Folks
    </div>
</div>

\``` <!-- remove escape '\' in your code -->

{% endcapture %}

{% include widgets/toggle-field.html toggle-name="toggle-thats" button-text="Cod for Thats All Folks" toggle-text=text-capture  footer="cheers!" %}
where:
- button allows for a custom button name (defaults to “Open” if omitted)
- toggle-text is the markdown text that is captured between the curly liquid brackets
- footer is for an optional label in the toggle block footer.
how ‘capture’ works:
As you can see in the code screen-shot, you’ll need to use Jekyll’s ‘capture’ variable assignment via the liquid capture tags.
I use the shorthand notation of three ‘`’s for code blocks, but that is just standard markdown and any markdown, will work between the capture and endcapture tags.
Copy, paste and substitute content and you’ll have toggle-blocks quickly accessible.
Here is the above code in action:
<div class="demo-thats-all-container">
    <div class="demo-thats-all-folks">
      That's All Folks
    </div>
</div>
This second example show’s that this toggle ‘widget’ with any markdown…not just code-blocks.
The rain in Spain falls mainly on the plain.
- How much wood could a woodchuck chop if a woodchuck could chop wood?
Behind the scenes, this is the ‘_includes/widgets/toggle-field.html’ ‘widget’ :
<div class="panel-group">
  <div class="panel panel-default">
    <div class="panel-heading">
      <h4 class="panel-title">
        <button data-toggle="collapse" data-target="#{{include.toggle-name}}" >
          {% if include.button-text %} {{include.button-text}} {% else %} Open {% endif %}
        </button>
      </h4>
    </div>
    <div id="{{include.toggle-name}}" class="panel-collapse collapse">
      <div class="panel-body">{{include.toggle-text | markdownify }}</div>
      <div class="panel-footer">{{include.footer}}</div>
    </div>
  </div>
</div>
Note the use of the humorously(to me at least) named liquid filter ‘markdownify’ which translates the captured markdown.
Why? Does this really make writing a blog easier?
While writing a blog using Jekyll doesn’t have a flashy GUI, getting accustomed to markdown isn’t hard.
It is true that more of these ‘widgets’ you use, the more Domain Specific Languages you have to remember. That said, these things like inline photos and toggle text boxes take a bit of a learning curve even within a fancy CMS.
Keep the code snippets easy to copy and paste and fill in the variables: the extra media in your posts really helps.